Paid subscriber bonus:Grab the Claude Code Essentials pack with self-building skills, customizable workflows, and copy-paste starter prompts.
I have a shameful confession to make.
Despite hearing great things about Claude Code for months, I’ve been hesitant to actually give it a shot. I mean, why try AI if you can not try AI, am I right?
I don’t know if it’s the scary “Code” word in its name, the fact that it isn’t free1, or the terminal interface that brings back painful childhood trauma of my MS-DOS and Norton Commander days.
Please. God. No. Not again!
The point is, I kept reading about Claude Code without taking any action.
But Claude Code chatter wouldn’t stop. Substack included.
Charlie Guo kept suggesting I try something like Claude Code or OpenAI’s Codex since late last year. Alex McFarland has built his entire writing system around Claude Code.
“Fine, Claude Code. You win! I give up! Happy now?!” I screamed at the wall, startling both of my cats, who already view me with suspicion on the best of days.
That is the story all about how I finally installed Claude Code on my Windows laptop and took it for a spin.
And, yes, Claude Code truly just…does things. Whether you work with code or not, there are likely a bunch of practical tasks Claude Code can help you with.
If you’re in the same boat as I was, you’re in luck.
Let me show you how to get Claude Code running and what it can do for you.
Check out my previous Claude Code articles to learn how to:
In simple terms, Claude Code is “Claude that can take action.”
In slightly less simple terms, it’s a Claude-powered agent that runs in your computer terminal2 and can see and modify files and folders (within reason, relax!).
That may sound minor, but it’s the difference between simply discussing your work with Claude and having Claude actually work on…your work?
Shut up, you know what I mean.
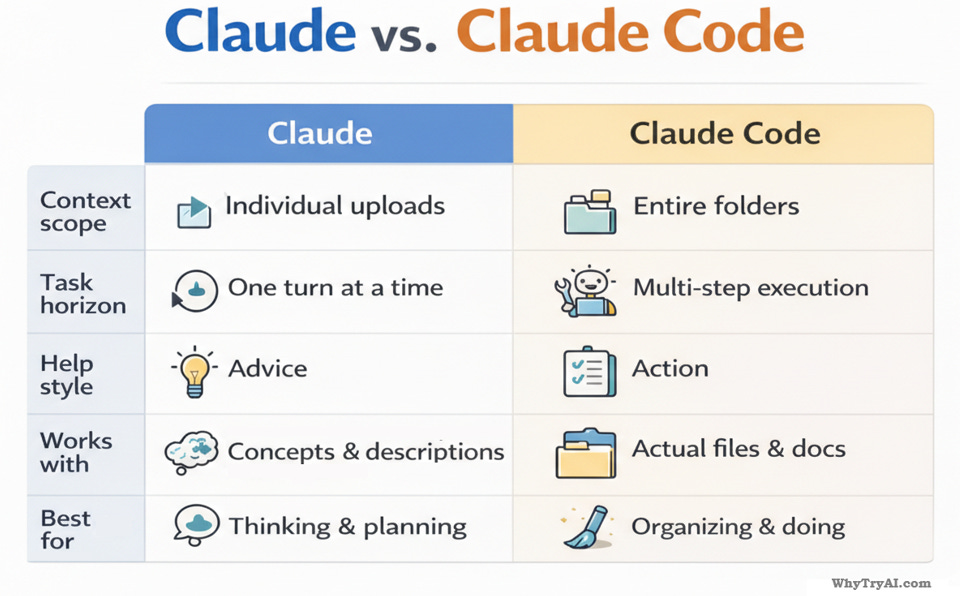
Why Claude Code and not “just” Claude?
Here’s a quick comparison:
Here’s what that means in practice:
Context scope: With Claude Code, you don’t have to manually upload files or paste text to provide context. It just sees everything within the designated folder.
Task horizon: Like any chatbot, Claude is built for back-and-forth interaction, one turn at a time. Claude Code, on the other hand, can create a multistep plan and run with it until it’s finished.
Help style: Claude is great for talking about things, while Claude Code is an agent that can go out and do things.
Works with: Claude Code can directly manipulate items and create new ones, unlike Claude that sticks primarily to text-based chat.
Best for: Claude Code is for when you need to actually make stuff happen.
The bottom line is that with Claude Code, you chat and take action in one place, without having to switch windows, copy-paste text back and forth, or upload separate files to work on.
Claude Code is an all-in-one interface.
It’s just too bad that it’s not a particularly inviting interface.
But we won’t let that deter us, will we?
Let’s get to work!
Setting things up
You can use Claude Code in many different environments:
On the web (mostly for working with code repositories)
But for today’s post, I’ll stick to the purest, vanilla-est implementation: Running Claude Code in your computer’s terminal window.
It’s the most flexible version of Claude Code, works directly with your local files and folders, and gives you the best baseline understanding.
1. Prerequisites
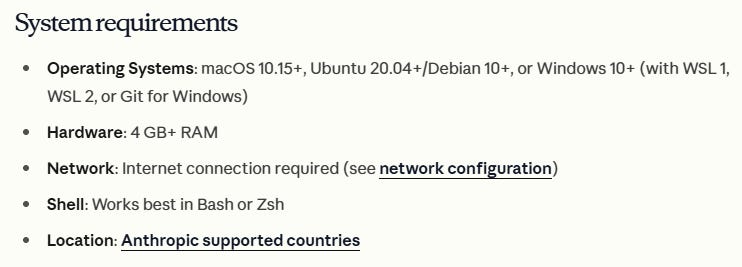
First off, check that your computer and operating system are up to scratch by going to: code.claude.com/docs/en/setup
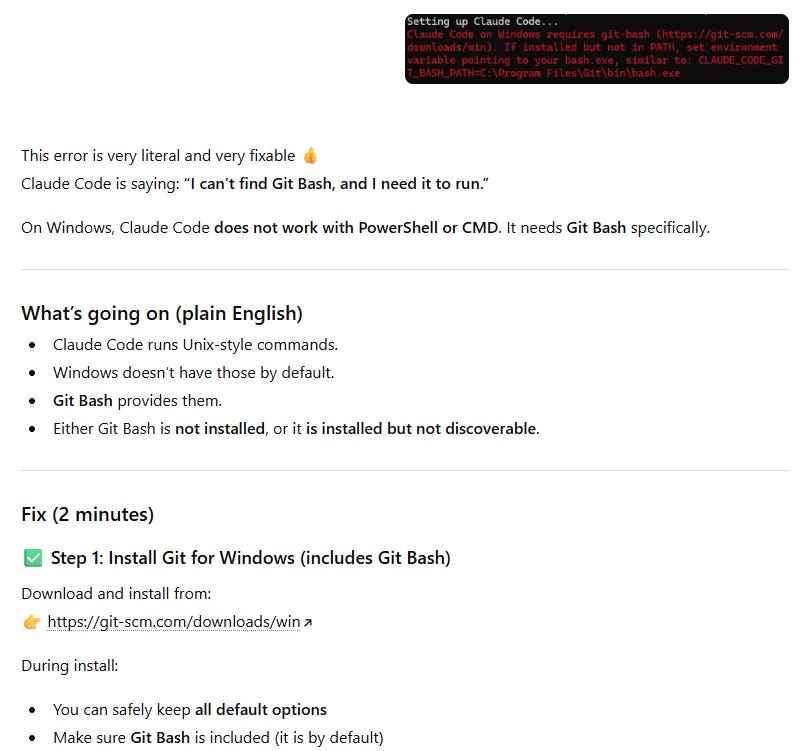
In the case of my Windows laptop, I also had to install the “Bash”3 above.
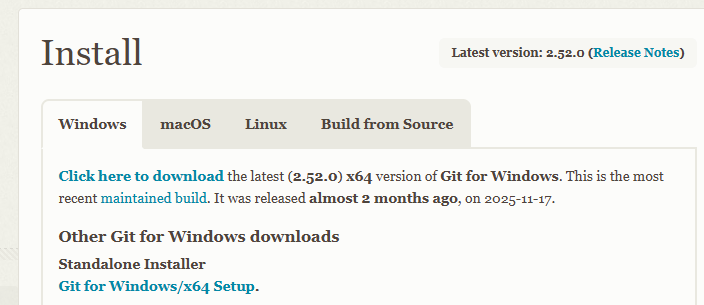
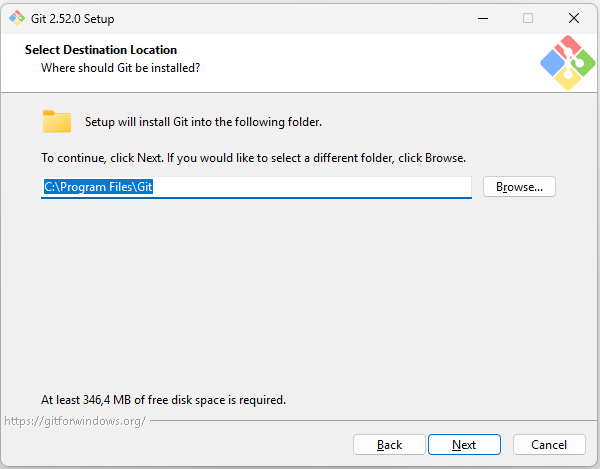
The fix was very straightforward: I followed the error message to git-scm.com/install/win and grabbed the relevant installer:
I then ran the file and installed it as any other Windows software:
You’ll see about a dozen selection screens during installation, but you can just leave all checkmarks at default and click “Next” on every screen.
Now you’re ready to get Claude Code running.
2. Installing Claude Code itself
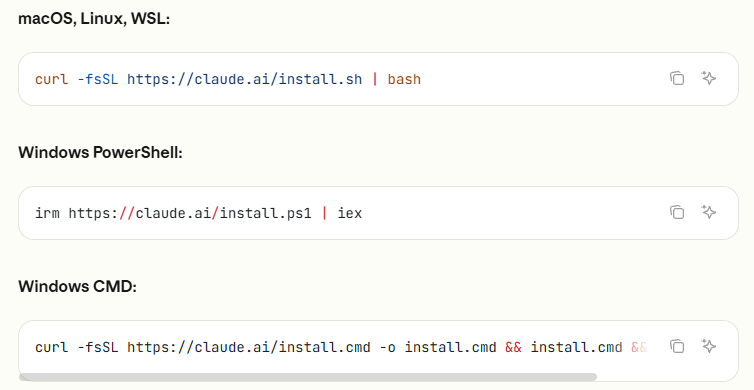
The setup page tells you exactly which commands to run depending on your OS:’
Windows PowerShell is what you’d typically want on a Windows PC.
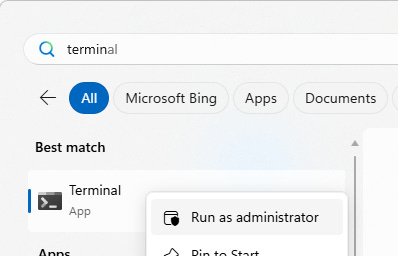
Start the terminal by…opening the “Terminal” app from the start menu:
I recommend right-clicking on the app and selecting “Run as administrator” as above to avoid additional authorization checks.
You should now see this inviting, beautiful terminal window:
On the plus side, you can briefly feel like a hacker in a 90s movie.
Now you simply copy-paste the relevant string from the setup page. In our case:
irm https://claude.ai/install.ps1 | iex
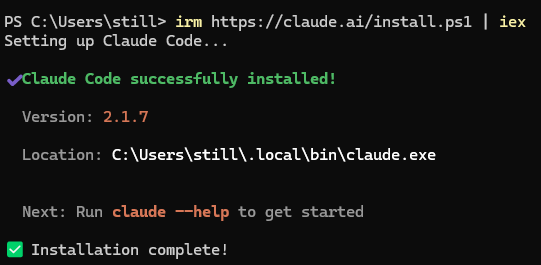
Hit “Enter,” and the setup should start:
If all goes well, Claude Code will be installed in less than a minute:
That’s it!
You’re ready to run Claude Code.
Mandatory disclaimer box: Depending on your system, you may run into some errors and dependencies, like I first did with git-bash:
The good news is, AI can help here, too.
I solved every issue using my no-prompt prompting concept and pasting error screenshots without additional commentary:4
See? Simples.
3. Running Claude Code
⚠️ Important: Claude Code will have access to any files and subfolders within its working folder. Since it can modify and delete stuff, you don’t want to give it access to your entire drive.
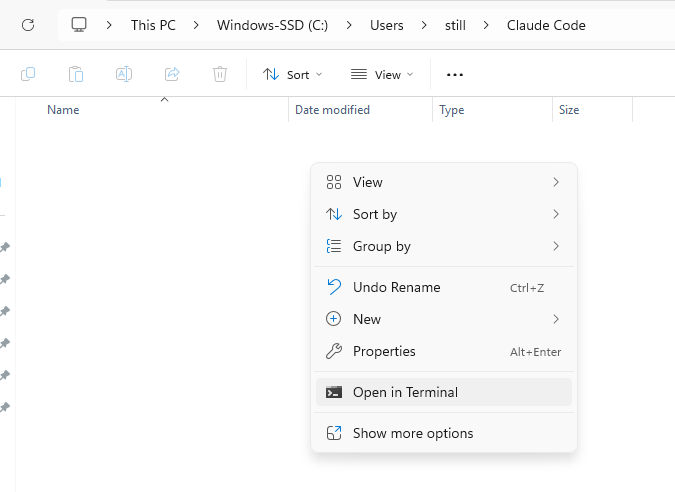
I therefore strongly recommend running Claude Code within a dedicated, sandboxed folder of your choosing. In my case, I made one literally called “Claude Code.”
Navigate to that folder in your file explorer, then start the terminal from there by right-clicking within the folder and picking “Open in Terminal,” like so5:
Now, Claude Code will only be able to see and work within that folder.
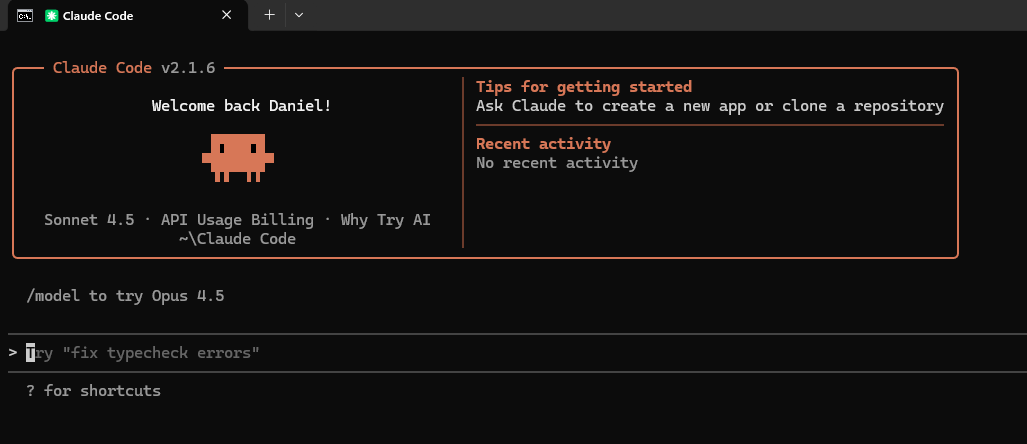
To start Claude Code, simply type “claude” and hit Enter:
If it’s the first time you do this, Claude Code will ask you to log in with a paid account:
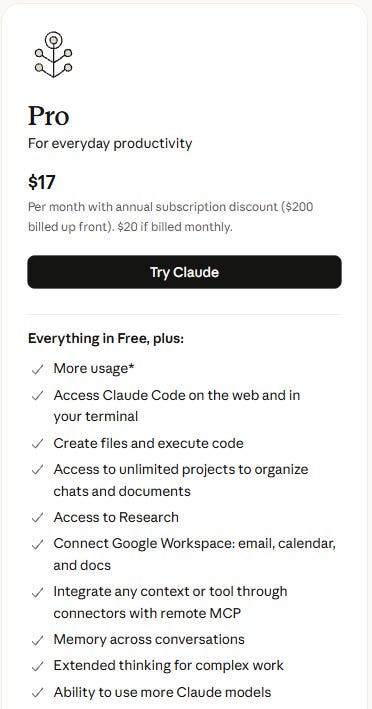
There are two ways to pay for running Claude Code:
Unless you only want to run a quick test on a minimum budget,6 I recommend going with the paid monthly subscription.
First, it’s much more cost-efficient7 and you won’t have to fiddle with APIs and credits.
Second, the more user-friendly UI for Claude Code in the Claude Desktop app only works with subscription accounts.
Finally, even if you decide that Claude Code isn’t for you, a paid subscription gives you many unrelated benefits (including access to the strongest Opus 4.5 model):
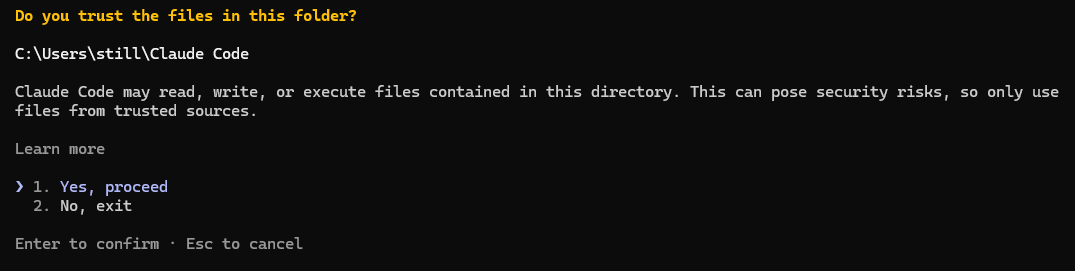
Once you log in with your paid account, you should see this message:
That’s Claude Code informing you of the risks and making sure it’s working in the right folder. If that’s the case, hit “Yes, proceed.”