Guide To Midjourney’s "Vary (Region)" Inpainting Tool
Midjourney's new "Vary (Region)" button in Discord lets you modify specific areas of an image. Check out how it works and what you can use it for.
Look…
After not one, but two Midjourney articles in the same month, I was planning to write about something else for a change.
I really was.
Shut up, it’s true!
But then Midjourney went and launched their much-awaited inpainting feature, aka “Vary (Region).”
So of course I just had to take it for a spin.
Right off the bat, I can tell you that it mostly performs phenomenally well and is a pure joy to play around with.
Let’s have a look at how Midjourney inpainting works and what you can use it for.
Off we go!
💡Want to become a Midjourney power user?
Start with the basics and go beyond in my 80-minute workshop:
Workshop: Midjourney Masterclass
·“This is one of the only webinars where I've actually been glued to my screen for the entire time, not distracted by passing whimsies... it was just so practical for how I use Midjourney (or should be using it, anyway!), and I learned a whack in a short period of time. Thank you so much for putting this on!”
What is “Vary (Region)”?
Vary (Region) is a new button that appears under any image you upscale:
It builds on the Vary (Strong) and Vary (Subtle) buttons that I’ve described in my post about Midjourney V5.2. These original options allowed you to modify the image while sticking to its general composition.
The new Vary (Region), on the other hand, modifies only the selected region while keeping all other parts of the image intact. So yeah, inpainting, basically.
How to use it?
Vary (Region) can be used in what I call “vanilla” mode to make minor tweaks or the full-blown “remix” mode to make pretty radical changes.
Let’s look at each of them:
1. Vanilla mode
Vanilla mode can create variations of parts of an image without altering their nature.
To showcase this, let’s first create a new image.
I’ll stick to the vintage Victorian photo theme from my Midjourney face-swapping post:
“Vintage photo of a Victorian man holding a gun”
Now let’s upscale the fashionable man who does violence in style with a fancy hat and a bushy mustache:
Say we love everything about this image (what’s not to love?!) except the gun itself.
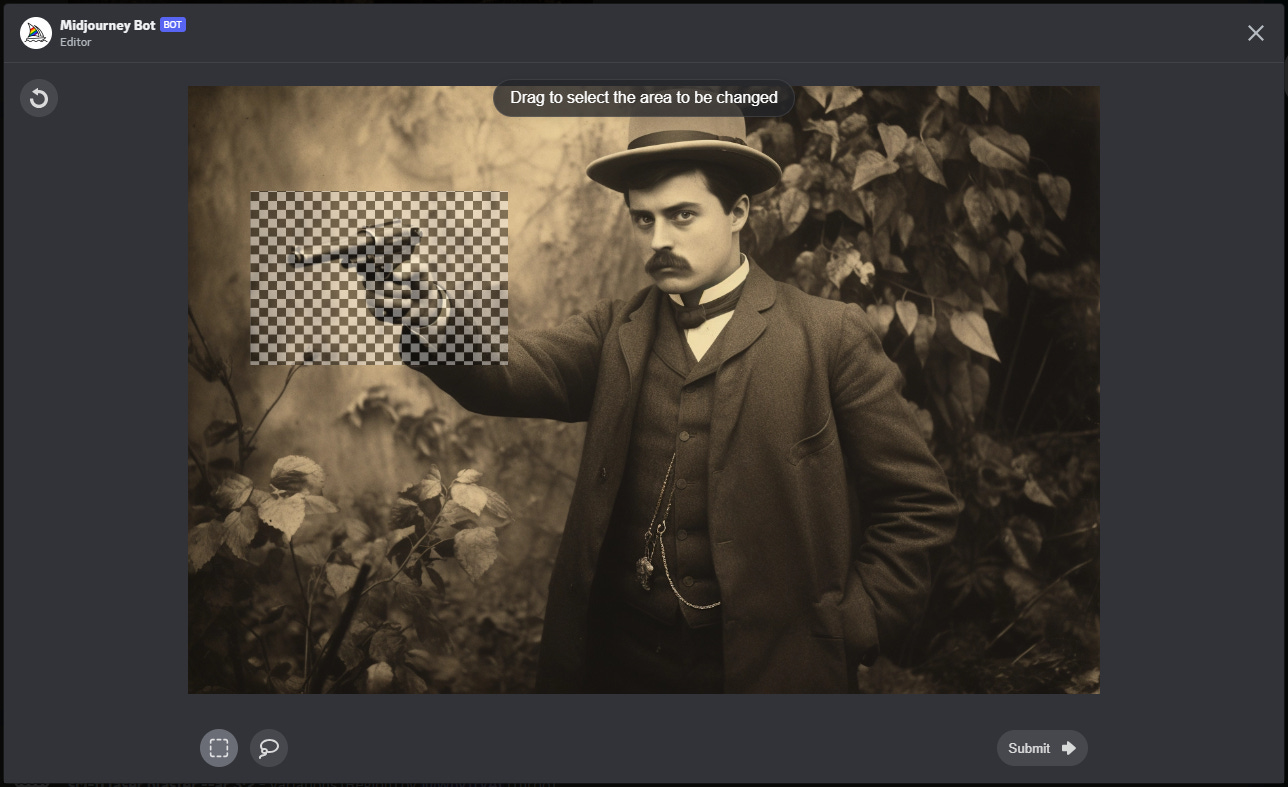
We can now click the Vary (Region) button under the image, which opens a pop-up editor:
The editor gives you two ways to highlight what you want to change:
Rectangle tool to select rectangular (!) areas of the image.
Lasso tool for more precise selections.
I find that the crude rectangle option is enough for most purposes, because Midjourney is exceptionally good at seamlessly blending new variations into the original image.
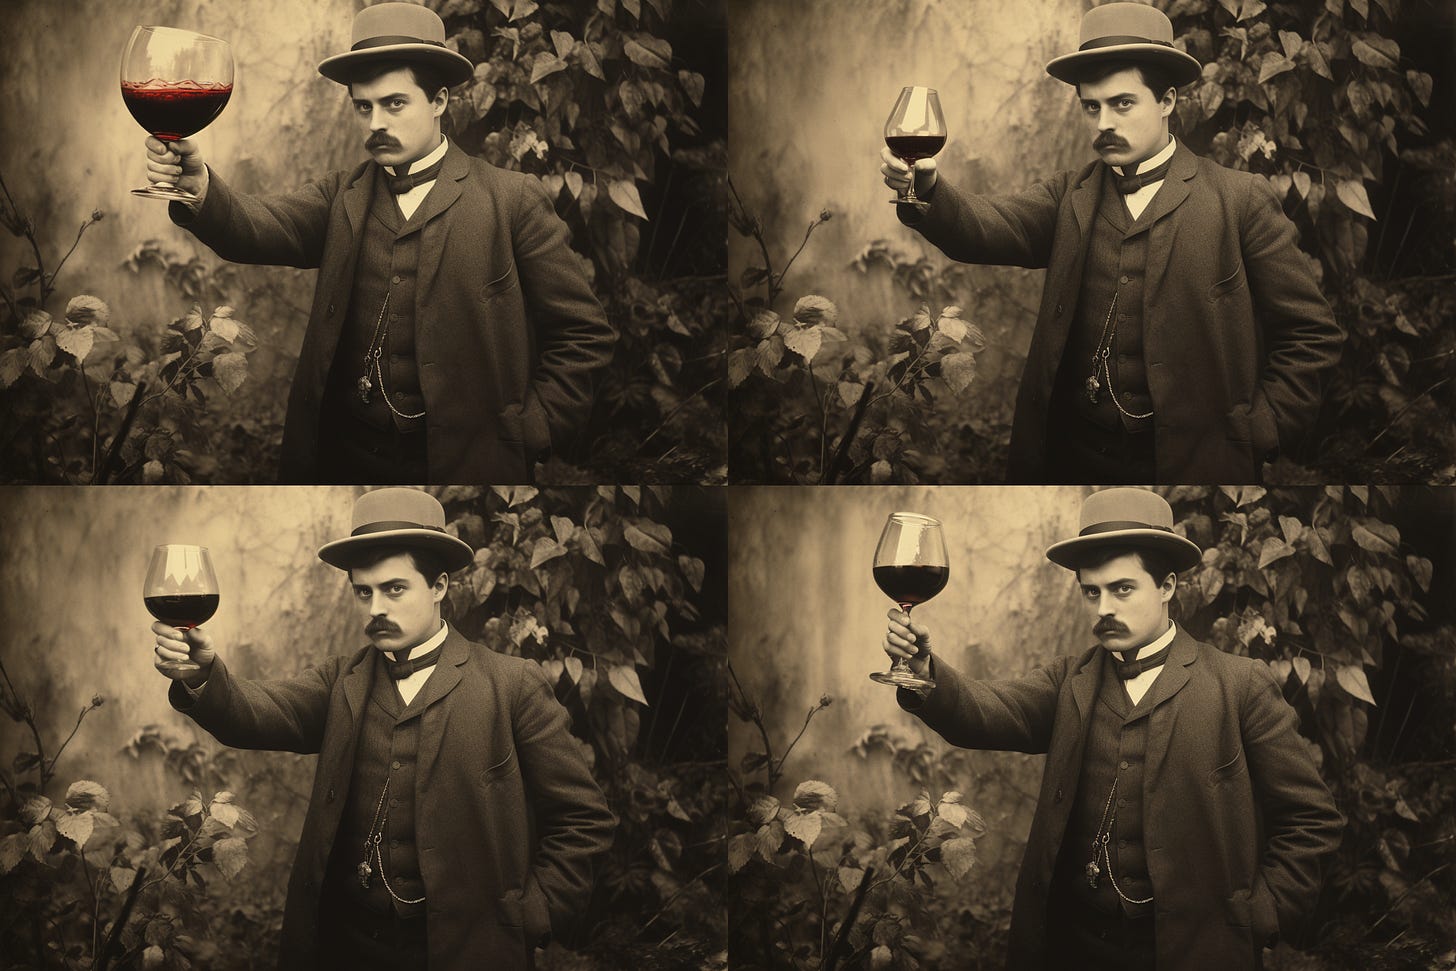
After we’ve roughly outlined the area around the gun, we can simply click “Submit” to generate a grid with four variations:
If you’re not happy with any of the four proposed guns, you can regenerate the grid as many times as you’d like using the "reroll” button under the image.
But in vanilla mode, no matter how many times you re-roll, you won’t get anything other than another gun.
If you want to really shake things up, you’ll need the Remix mode.
2. Remix mode
This is proper inpainting and where true magic happens.
First off, make sure to turn the “Remix mode” on by following the steps in this article about Midjourney commands.
You can also just use the /settings command to bring up the Settings menu and toggle the “Remix mode” button so it turns green:
Once that’s done, let’s go back to our image and click Vary (Region) again:
Everything’s pretty much the same as before…but wait!
What’s this input box at the bottom?!
This, friends, is where you tell Midjourney exactly what you want to see in the selected region.
By default, it’ll show the original prompt used to generate the image. But you can type whatever you want into this box, like so:
Note that your new input doesn’t have to follow the original prompt or be long and complicated. Submit your new prompt with the little arrow on the right:
Now watch as Midjourney miraculously injects your requested object into the area you’ve selected:
Let’s upscale the bottom-right image by clicking the appropriate button:
Poof:
The best part? We can now select a different region to remix:
Excellent:
We can carry on with this process until—like the Ship of Theseus—we’re no longer sure whether our Victorian man is who he was at the start.
Practical use cases for MJ inpainting
“Okay, Daniel,” you say with a smug grin, “This sure is a nice little toy you’ve got there. But does it, like, serve any practical purpose?”
I hear you, Smugsy McGrinFace, and I’m here to show you a few ways to use inpainting for something other than goofing around.
Note: Click a gallery image to see it in full size and the right aspect ratio1. Making subtle tweaks
Quite often, Midjourney will spit out something you really like, except for one pesky element. Inpainting lets you replace that element with anything you want while keeping the rest of your image exactly the same.
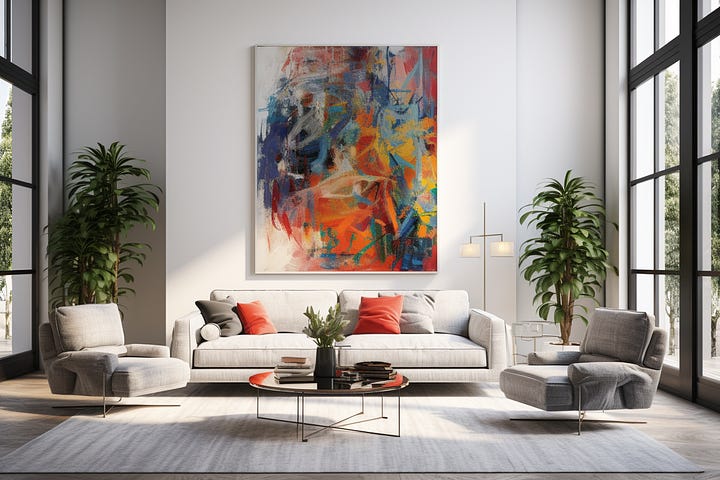
Here’s an example where I exchange an awesome abstract painting for a flat-screen TV, like an uncultured idiot.
“Lifestyle photo of a modern living room.”

Or maybe Midjourney generated the perfect model to showcase various clothing styles in your Shopify store.
Vary (Region) lets you switch clothing items out, going from the original blue dress to a black leather jacket in our example:
“Woman in a blue dress, fashion photography”


(Of course, Midjourney can’t be used to accurately reflect the actual clothing options in a store, but it’s certainly enough for general “lifestyle” inspiration shots.)
2. Removing unwanted items
Get your head out of the gutter.
Pervert.
But yeah: In certain cases, you may want to remove an object altogether rather than swapping it for another one.
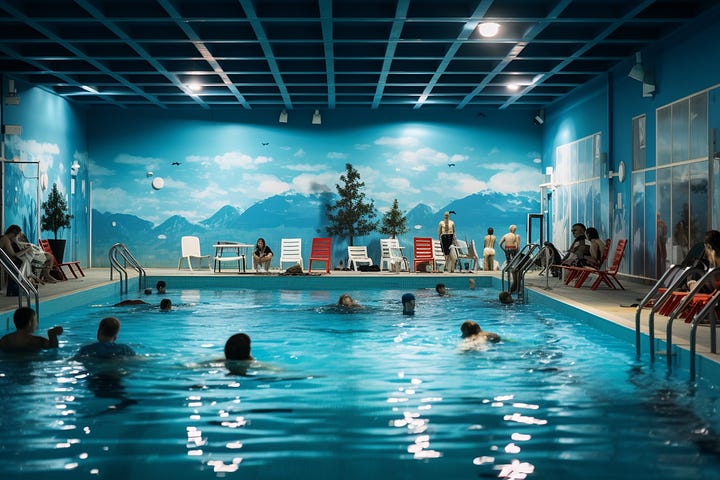
Take this Midjourney-generated photo of a public swimming pool:
“Photo of people in a public swimming pool”
I think there are too many people in the water and want to remove the two swimmers closest to us.
With Vary (Region), it’s a simple matter of selecting the swimmers and using a prompt that matches whatever’s around them (simply “water” in this case):
And here’s our before vs. after comparison:

Pretty smooth, right?
3. Adding new elements
In the same vein, you may want to insert new objects into an image you otherwise like.
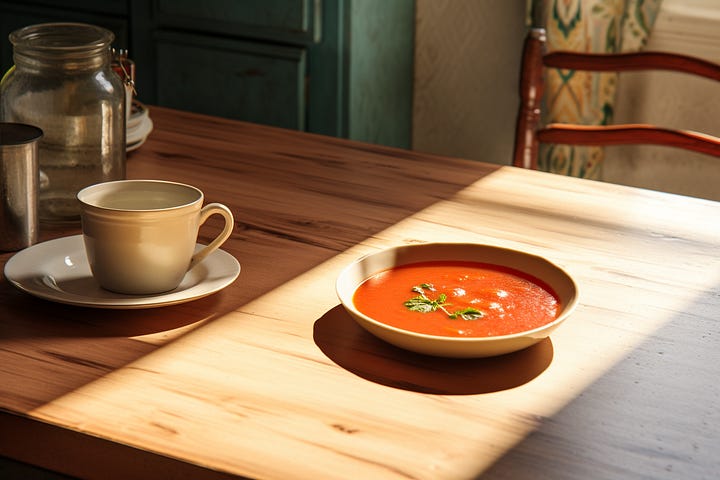
Watch me add a bowl of tomato soup to this image of a kitchen table (see how Midjourney even manages to almost match the shadow’s direction to the original):

Or how about giving this happy hippo a pair of trendy yellow glasses?
“Portrait photo of a happy hippo, vivid colors”


He’s even happier now, if that’s at all possible.
4. Fixing AI artifacts
Let’s face it: No matter how impressive text-to-image models have gotten, they’re still far from perfect.
Midjourney frequently returns images that look great at first glance, only for you to start noticing all sorts of weirdness upon a closer look.
With Vary (Region), you can now often fix the issue directly.
Here I manage to (mostly) remove mutant multi-fingers from an image:
“Couple holding hands, professional photo”


You could always make such edits in your preferred third-party tool, but having this option in Midjourney sure is convenient.
Limitations of the Vary (Region) tool
The Midjourney team lists several limitations to be aware of.
Might not work for smaller selected areas
For best results, Midjourney recommends selecting a relatively large portion of the image to modify (20% to 50%).
If the selected area is too small, the editor won’t even let you submit your request:
So don’t count on MJ inpainting for lots of tiny, precise tweaks. You’ll still need professional software for those purposes.
Struggles with out-of-context changes
You want to make sure you’re asking Midjourney for changes that fit with the rest of the image.
Inpainting a bowl of tomato soup onto a kitchen table? Makes perfect sense!
But check out the nightmare fuel Midjourney came up with when I asked for a “leprechaun” instead of tomato soup:
A leprechaun is simply too nonsensical in this setting for Midjourney to know what to do with him.
Can’t work with real-world input
As we’ve seen in our clothing model example, you can’t feed Midjourney an actual real-world product catalog and have those products inpainted into an image.
You’re at the mercy of whatever Midjourney randomly generates based on your text prompt.
So yeah, Midjourney inpainting is not a silver bullet.
But man, look at just how far we’ve come compared to this November 2022 post of mine about text-based inpainting!
Over to you...
Have you already tried the Vary (Region) tool? And do you have experience with other inpainting tools? How do you feel they compare?
I’d love to hear your thoughts. Leave a comment on the site or shoot me an email.
One more thing: I finally uploaded a lot of my Midjourney stuff to this Behance account. So if you want to see the kind of AI nonsense I force poor MJ to create, it’s there.


