

If there’s one thing about me, it's that I don’t have the best visual design skills:
Turn Your Doodles Into Art Using AI (With Examples)

Let’s get one thing out of the way: I suck at drawing. If I challenged a 4-year-old to a drawing contest, two things would happen:
1. “Security! Quick! This man is harassing the kids again!” his kindergarten teachers would yell.
2. I’d lose. Badly.
(You’ll soon see proof that I’m not kidding about my poor drawing skills.)
If there’s a second thing about me, it’s that I’m somehow always several months late to trying awesome AI features:
Claude Code for the Rest of Us: Installing & Getting Started

I have a shameful confession to make.
Despite hearing great things about Claude Code for months, I’ve been hesitant to actually give it a shot. I mean, why try AI if you can NOT try AI, am I right?
Today, those two things collide!
Yes, friends, I’m finally diving into the wonderful world of Claude Design.
I know, I know.
Claude Design came out in mid-April, and it’s now mid-August.
(Refer to thing #2 above.)
If you haven’t already read my critically acclaimed Sunday Rundown #137, here’s a quick video intro to Claude Design from Anthropic itself:
And man, Claude Design can create just so much stuff, y’all!
UI mockups, slides, 3D objects, diagrams, you name it.
But right now I’m especially enjoying the “Animation” option:
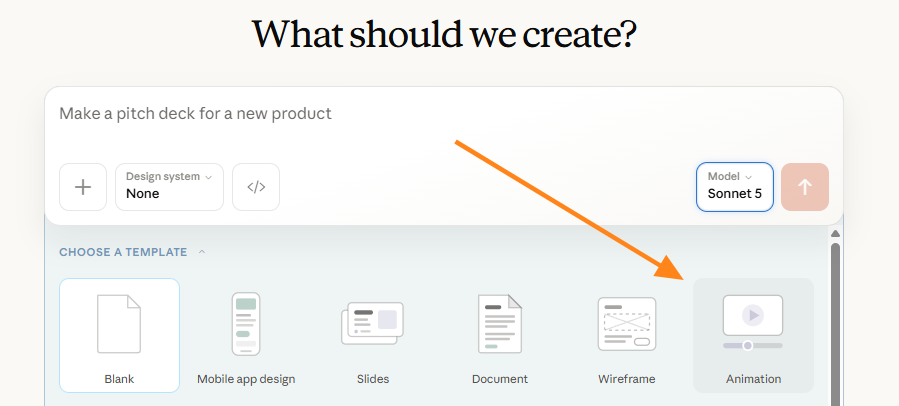
Yes, Claude Code could previously create motion graphics via third-party tools such as Remotion and HyperFrames.
But Claude Design does something similar right out of the box.
I’m honestly taken aback by how polished these animations turn out.
So today, I’ll walk you through:
What you need to use Claude Design
The 3-step process for getting great animations
3 demo examples of things you can use Claude Design for
Take-home booklet with use cases, helpful tools, and more [paid bonus]
Let’s roll!
Using Claude Design
You can use Claude Design directly on the web or in your Claude desktop app: it’s in a separate “Design” tab in the left-hand corner:
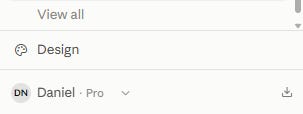
Some important stuff to keep in mind:
You’ll need a paid Claude account (Pro or above) to use Claude Design
Claude Design counts against the same rate limits as Claude Code and chat
Using more capable models consumes these limits faster
If you’re good with all of the above, head on out to claude.ai/design and log in with your paid Claude account. You should see this welcome screen:
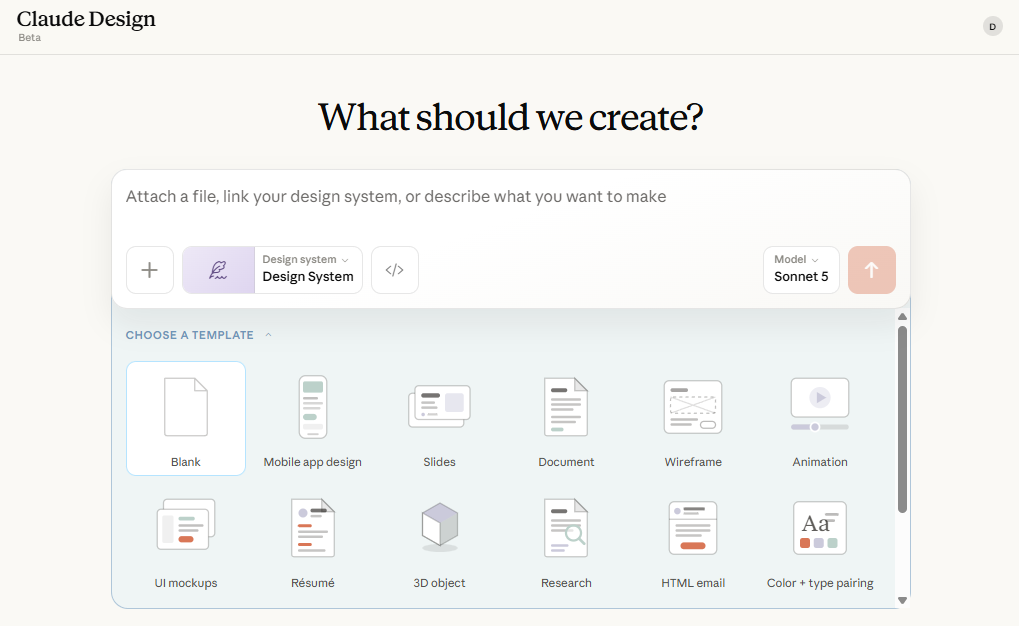
From here, choose the “Animation” template, and you’re ready to get going!
3-step work process for animations
You can split the flow here into roughly three phases:
Inspire: You tell Claude Design what you want and how it should look
Interview: Claude asks you follow-up questions to flesh out the vision
Improve: You chat with Claude to fix any issues and tweak the design
Let’s walk through each step with a worked example.
1. Inspire
This is where you upload your reference files, style guides, images for inspiration, pick the underlying “design system,” and write your prompt.
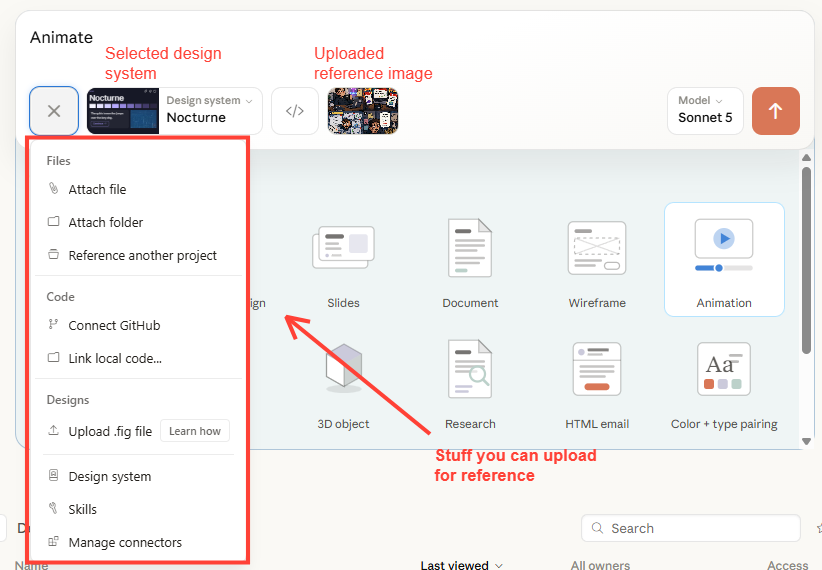
To test this, I saved my “Computer Use” post from last week as a PDF, uploaded it for reference, and asked for the following:
Analyze the content of this file, extract the main learnings, and create an educational animation.
I didn’t pick any design systems or other style directions:

Claude Design instantly got to work reading and analyzing the PDF:
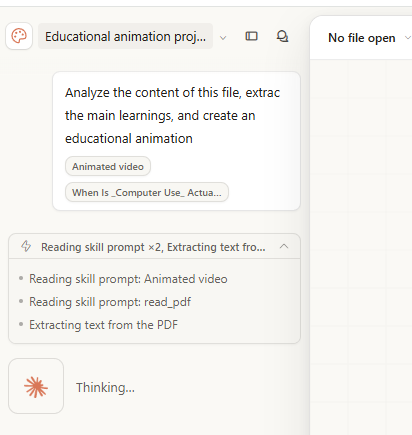
After it’s done, Claude will often have follow-up questions, which brings us to…
2. Interview
One of my go-to pieces of AI advice is to use the “ask me questions” method, where you explicitly tell chatbots and agents to interview you about your request so they get better context.
With Claude Design, this step is built into the process by default.
If Claude feels your task is complex or ambiguous, it’ll automatically present you with a series of questions:
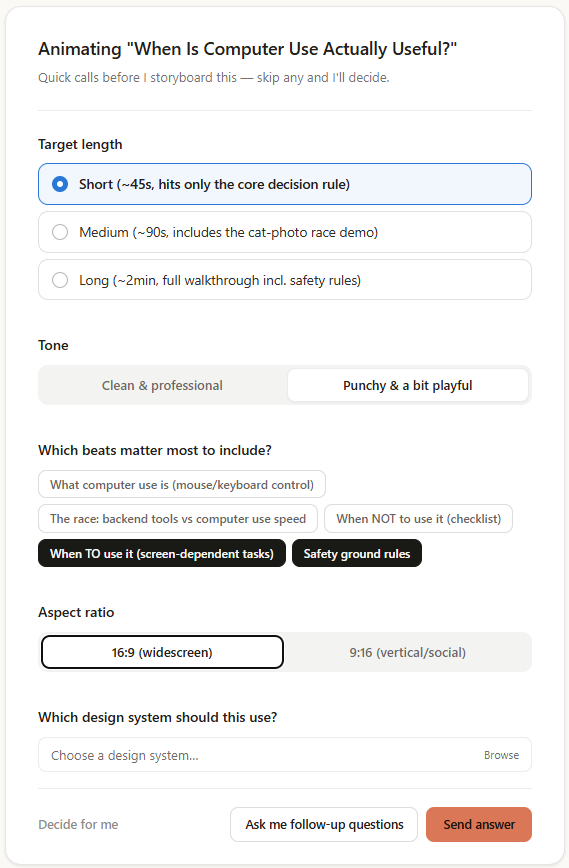
You will usually have three options:
If you don’t care, simply click “Decide for me”
If you only care about the top-level decisions, answer the first screen and click “Send answer”
If you want to go even deeper, pick the “Ask me follow-up questions” button
In my case, I went through two additional rounds of questions:
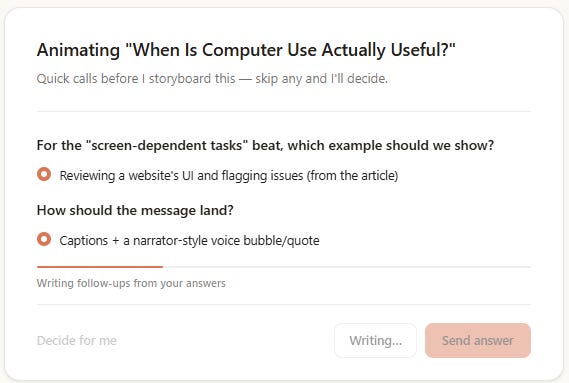
And…
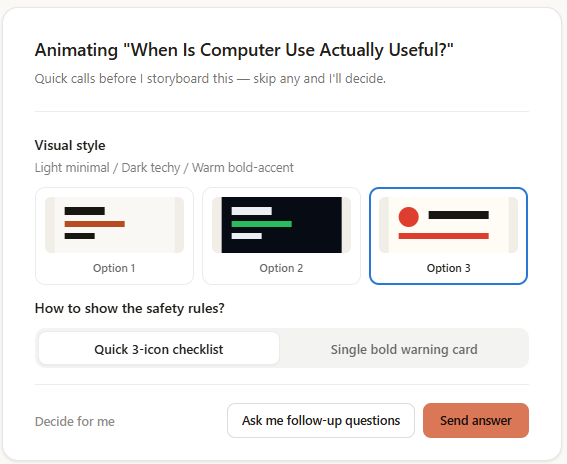
As you can see, you can get quite granular and precise to really dial in on your vision.
When Claude has everything it needs, it’ll work for a while and come back with the finished animation.
But you’re not quite done yet.
Pro tip: I find that stronger models like Opus are more likely to go deeper and ask questions than, say, Sonnet. If you want to make sure to see the follow-up flow, simply add this at the end of your prompt: “Before creating the animation, ask me follow-up questions to make sure we’re aligned.”
3. Improve
Claude Design often comes back with something usable on the first try.
But in many cases, you’ll want to add extra elements or fix anything that looks off.
The good news is that making changes is as simple as chatting to Claude Design about what you want.
Depending on what you’re after, try a few different options:
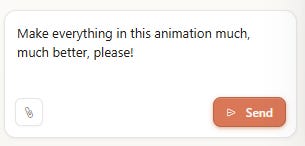
1. General changes = freeform chat
If you want to change the look of the entire animation—e.g. rearrange the order of the slides or use different colors—try the open-ended chat:
2. Chapter-level changes = reference the chapter
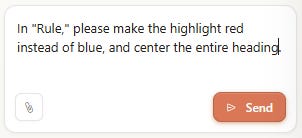
Claude Design splits your animation into distinct “chapters” and gives them names:

If I don’t like something in the “Rule” chapter, I can ask Claude for targeted changes:
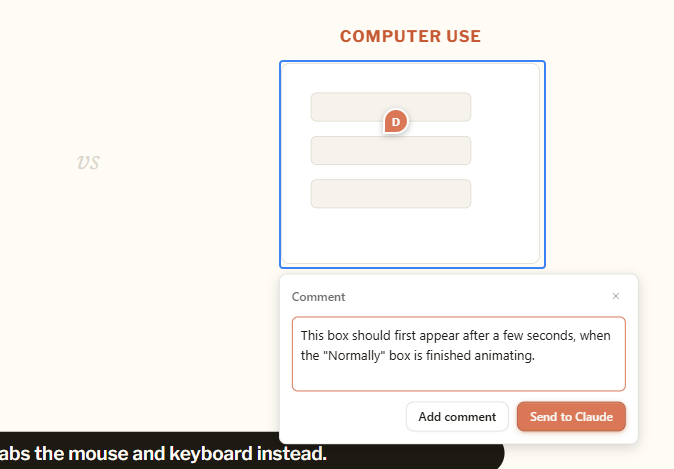
3. Granular changes = use the “Comment” option
At the top of the animation sits a “Comment” button:
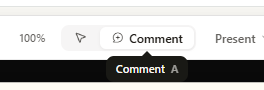
Picking it lets you click a specific element or area and ask for precise tweaks:
Pro tip: Sometimes Claude will make the requested tweaks, but the animation itself won’t reflect them. (This often happens if you have that same screen open while Claude works on it.) Before assuming nothing happened, try the “Reload” button in the upper-left corner:
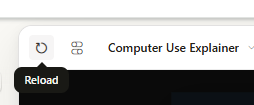
This should refresh the entire animation with any changes Claude made.
While working on the “Computer Use” example, I only asked for a few minor tweaks.
Here’s the final result:
Everything you see above has been coded and animated by Claude Design, from the headings and icons to the interface visuals and moving cursors.
The entire process took under 10 minutes.
Claude Design is truly a stupid simple way to create motion graphics from scratch.
Exporting your creations
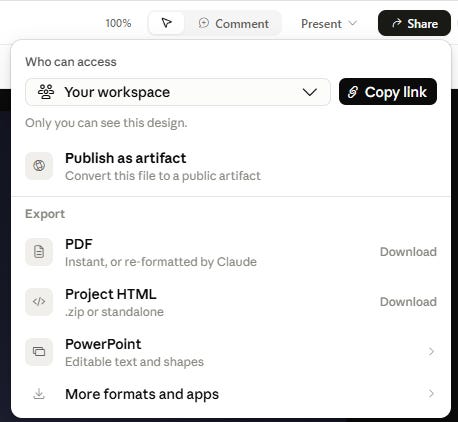
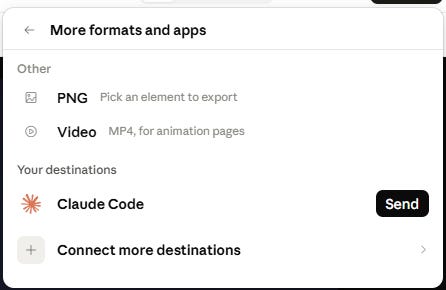
You can download your Claude Design animations in different formats or export them for further work in Claude Code or connected third-party tools:
Three demo use cases (+outputs)
There are many ways to use Claude Design’s animation features. (My bonus booklet at the end has 60 different ideas.)
Let me show you three of them.
Use case #1: Animating static assets
This one’s simple but fun.
If you have any static visuals or brand assets, Claude Design can animate them.
I uploaded my own publication logo:

And used this advanced, power user prompt:

Here’s the first take:

I didn’t exactly give Claude Design much to work with, so it did okay under the circumstances.
Pro tip: This approach works even better if your existing static assets are in SVG format. This way, Claude Design can manipulate them precisely and get more creative.
Use case #2: Bringing stats and data to life
A more useful application is animating dry stats or figures to tell a story.
For my demo, I grabbed this “MCU & Marvel Media” public dataset from Kaggle.
I picked the ready-made “Nocturne” design system and asked the following:
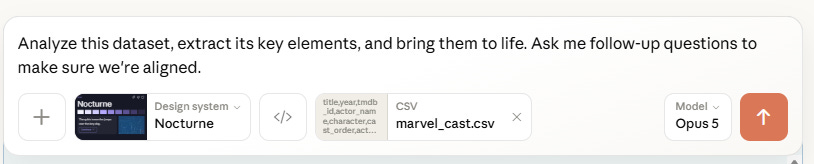
Because I chose Opus 5 and requested follow-up questions, Claude interviewed me:
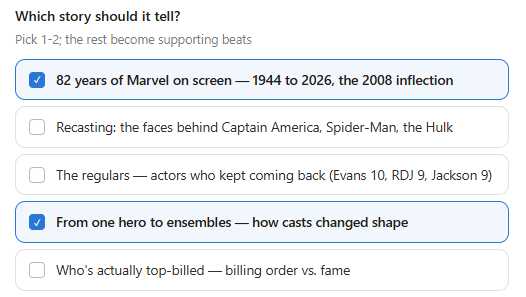
A few question screens and several minutes later, I had this:
Claude Design automatically pulled the actor headshots referenced in the dataset and assembled1 the stats from a simple CSV sheet into a coherent visual narrative.
Pretty neat, huh?2
Use case #3: Synced B-roll footage
This one’s both practical and fun.
I first saw the approach in this awesome Futurepedia video.
The idea is to get Claude Design to make B-roll animations that sync perfectly with an existing “talking head” video (or even just audio).
It works like this:
1. Record your “talking head” video (or audio)
Record or grab existing footage of someone talking.
I recorded this take about my “Inspire. Interview. Improve.” process:3
I know. I’m dazzlingly handsome, and my voice is smooth as silk. Thanks for noticing.
2. Get a time-stamped transcript
Many tools can extract transcripts from video and audio files.
I followed the Futurpedia approach and uploaded the clip to Gemini.
Gemini parses videos natively, so it gave me a usable transcript in seconds.
The prompt is super simple: “Give me an SRT transcript for this”:
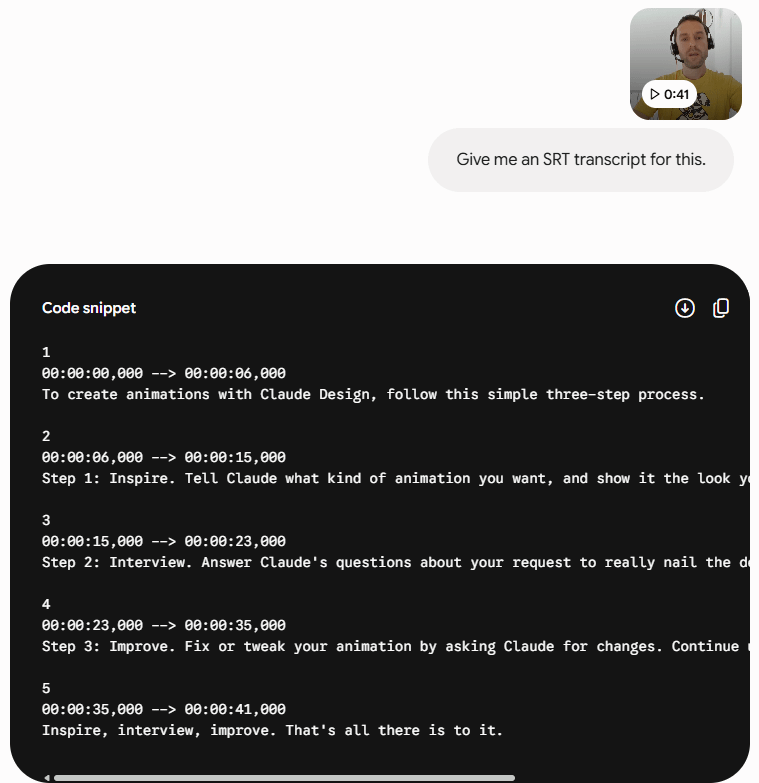
Because I wanted Claude Design to animate certain individual words, I needed a more granular transcript…so I asked for it:
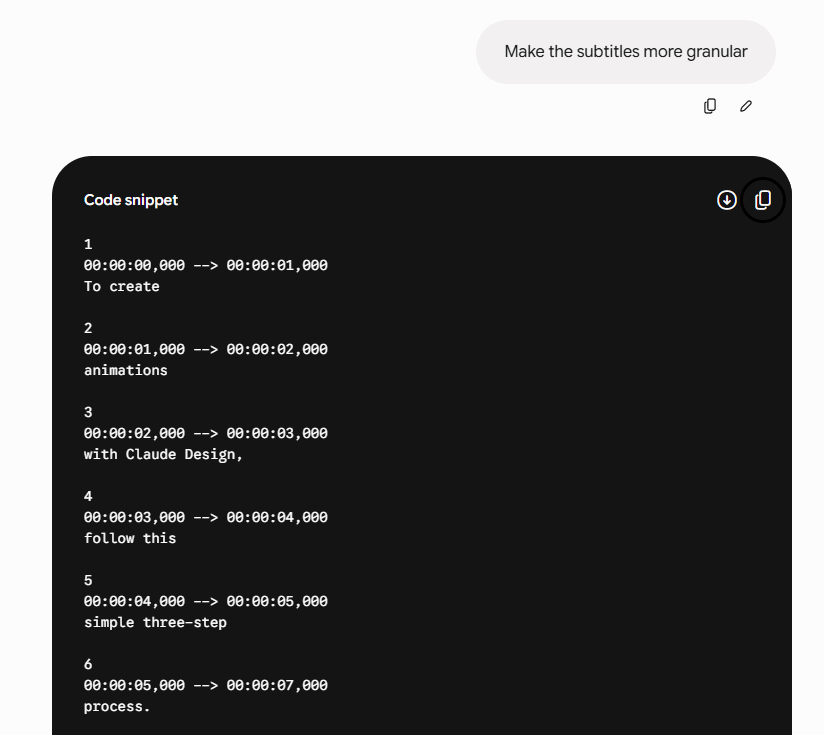
I was now ready for the Claude Design step.
3. Request your synced animation
Upload your video to Claude Design and tell it to create the synced animation:
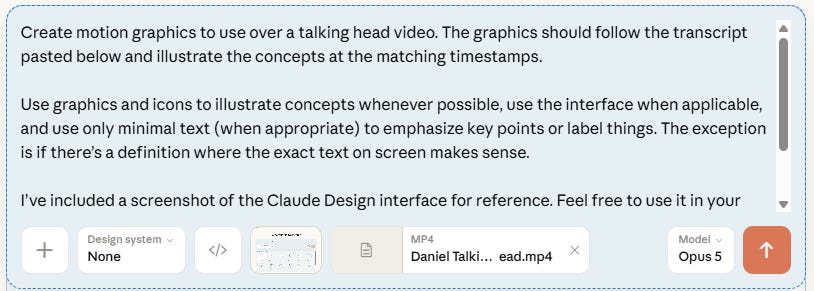
In my case, I also uploaded a screenshot of the Claude Design interface itself, because I wanted Claude to use it in the animation.
Finally, I used this lightly modified version of the Futurepedia prompt:
Create motion graphics to use over a talking head video. The graphics should follow the transcript pasted below and illustrate the concepts at the matching timestamps.
Use graphics and icons to illustrate concepts whenever possible, use the interface when applicable, and use only minimal text (when appropriate) to emphasize key points or label things. The exception is if there’s a definition where the exact text on screen makes sense.
I’ve included a screenshot of the Claude Design interface for reference. Feel free to use it in your animation.
Aspect ratio: 16:9
Transcript:
[Paste SRT transcript from Gemini here]
Here’s the animation Claude Design made:
4. Pull it all together
Open your video editor of choice and place your talking head video over the Claude Design animation. I used Microsoft Clipchamp because it came with my laptop and because I’m simple like that.
Since I used the granular time-stamped transcript, the videos synced perfectly, so I didn’t make any edits beyond resizing and placing the “talking head” over the animation.
Here’s the final result:
Note: If you only want audio and no talking heads in your video, the process gets even easier. In this final step, you’ll have just two tracks in your video editor: your audio track and the Claude Design animation. So you won’t have to overlay the talking head over the animation or fiddle with any other visuals.
Bonus: “Claude Design Animations” booklet
There’s way more you can create than the three examples above.
So ChatGPT and I made a downloadable 15-page field guide for paid subscribers.
It includes a quick refresher of key concepts from this article, plus:
60 Claude Design animation ideas spanning six categories: branding, content and video, teaching, data, marketing, and personal projects.
Brief builder with stuff you may want to tell Claude before it starts
A “motion vocabulary” to describe how elements should move on the screen.
A list of free and paid third-party tools to use with Claude Design (visual reference libraries, color & font makers, video editing tools, and more)
A final pre-export checklist (content, timing, readability, layout, etc.)
…and more
It’s mostly for skimming rather than reading cover to cover.
Download the PDF below and keep it nearby for the next time you want to turn your static assets and ideas into motion graphics:

A lil something to sweeten the deal (first come, first served)
I currently have three Anthropic guest passes.
Each of them grants a free 7-day trial of Claude Pro, so you can take Claude Design for a spin.
If you upgrade to a paid Why Try AI subscription via this post, send me a Substack message or email me at whytryai@substack.com and ask for a guest pass.
If I still have any left, I’ll hook you up!
The passes are first come, first served, so upgrading doesn’t guarantee one. But there are many other reasons to upgrade while also supporting me.
(Please note these eligibility requirements and other caveats from Anthropic.)
Thanks for reading!
If you enjoy my work, here’s how you can help:
❤️Like this post if it resonates with you.
🔄Share it to help others discover this newsletter.
🗣️Comment below. I love hearing from my readers.
🔓Support me and unlock cool perks by going paid:
If you know, you know.
Normally, I’d double-check for hallucinations, etc., but the point here was to demonstrate how simple the prompt-to-animation flow is, so I didn’t and can’t rule out errors.
Yes, I’m reading from a Notepad file with my ready-made script. No, I’m not a seasoned video content creator. Yes, I’ll stop talking to imaginary people.
Time to lose these substack shackles and go big on YouTube
Love it!!! You picked the perfect use cases to demonstrate the power of Claude Design :)
I'm curious, how much time did it take you to finish each job?
Still using Hyperframes most of the time, now I wonder if I should switch to native Claude.